05 May 2018

Shaker style New Lebanon worktable


'lifted' ends
I don't make a habit of incrementally posting updates throughout my buildouts. I approach every posting from this side of the great firewall with a bit of frustration and a modicum of dread. Having to negotiate blogspot.com with an unreliable internet service and mandatory VPN means that basic postings require more time than is necessary for those outside the Middle Kingdom and there is always the lingering potential to unexpectedly lose data. I have wondered whether posting more often might increase comments or having more commenters might more likely increase my willingness to post. Chickens and eggs.
I had been playing with the idea of a drawered table for a time but I wasn't fully sold on a design until I came across the example from the Metropolitan Museum. I had seen corner tables with drawers on two adjacent sides but this example convinced me to take a plunge. Knowing the overall dimensions made it fairly easy to determine the other essential dimensions with a set of dividers and a large printout.
the starting point of the build
Museum curators generally focus on external appearances even when the internal details are the greater focus of interest for woodworkers. I am confident enough to aver that I can recognize best practices of drawer construction, both from reading and from having repaired antiques. Before making this piece, I was less confident with knowing what best practices are with regard to what the drawers are pulled out of and slid back into. The most basic method is a box inside a box construction. I've been also making some 'spice cabinets' and so this method has been at the front of my mind. Scaling up from such a small cabinet requires a different approach. Modern woodworking practices have all but abandoned wooden construction in favor of metal slides. The main advantage I can see to these devices is that they do not allow for pulling out a drawer too far. The photocopy above shows a few construction details but also leaves many out. One can see the bottom runners that support the middle drawer. I also deduced that the kickers for this same drawer are the bottom rails which support the two smaller drawers. This double duty of one element is just one appealing aspect of this design. There were still more internal details that needed to be worked out as work progressed.
the single piece runner and guides
My first innovation was to make runners and guides out of one rabbeted piece. Most often when doing repair work on antiques these the guides and runners are found to be nailed together and to the interior. In general, I want to avoid this shoddiness. Starting with the center drawer, I aligned and cut the guides to fit between the legs and then inset the the runners into dadoes in the front and back legs, securing the pieces to the front legs (where greater stresses come into action) with a single 5mm screw in each and only gluing into the back legs with hide glue.
I then cut the runner section of the similar rabbeted length to fit between the spaces of the lower rails, letting the guide portion merely touch the legs. These were attached with 8mm dowels, using dowel centers that I bought in Amsterdam.
Shaker refinement
In keeping true to the high standards of Shaker craftsmanship I turned tapered drawer pulls, using a tapered deburring tool. A fluted reamer would likely leave a smoother surface but this tool, nonetheless, is adequate. I left enough length to allow a compressed fit with just a touch of glue to hold the joint together.
I made a few changes that, I believe, are worthy of mention. I added a beaded edge to the bottom of the rails. I think it just looks better, giving a clearer visual cue. The original piece is assembled from a variety of wood species by a craftsman who knew their properties and how to select the best pieces from a much better quality lumber supply. I used the best of the SYP stock that I have on hand and some hard maple that was sawn in Dongbei some time ago, (The woodshop chief bought a large pallet of it because much of it is spalted.) and a limited stock of German red beech. Clear, straight grained maple was selected for the legs; whereas, the original has cherry (by eye).
maple on maple
As anybody who has repaired antique case furniture quickly learns, one weakness of drawers is that the sides, usually made of softwood to reduce weight, are worn down from years of being abraded across hardwood rails and runners. It's a routine repair to remove the sides and attach new wood to replace this loss. I decided to forego this eventuality by gluing a strip of maple along the bottom of the sides before milling them to final dimensions. It remains to be seen how well this solution benefits this piece. A hundred years of in and out will bear witness.
Since this is a worktable (of an unspecified function), it's understandable that the original tabletop was made with reinforced edges. It also has a raised lip on all four sides that appear to meet at mitered corners.  I don't need a raised lip and I considered attaching a breadboard end of hardwood, which is still an option on any additional pieces. Somebody using the woodshop for an order of beech tabletops had left a bundle of beech strips that I pulled from the waste and happily applied to strengthen the sides.
                                    {insert expository photo here of innovative design feature}
From one of the Metropolitan Museum's online photos, there appears to be a stop that prevents accidental overwithdrawal.  (It's a word!) I started to think about this (safety) stop as well as backstops. I eventually decided to simply focus on the backstops. Since it's not a typical configuration to have two opposing drawers in case construction, the goddess, Moulariprionia, blessed me with this inspirational solution. I surface planed a length of maple stock to a thickness that snugly rested between the backs of the drawers so that they both were flush with the exterior. I then cut out recesses, scribed and centered from the inside dimensions of the long upper rails.  Onto the upper projections I pared tapered slopes into one side, which was then used to transfer the receiving mortises. After sawing into the rails the mortises were fully chopped out. Thus one piece was made to function as backstops for two drawers and a support for the tabletop.

the only backstop available for viewing
I swear I took a photo of this joinery before screwing through the upper rails with three screws on each end, the two screws on the left and right driven into crossgrain slots, into the tabletop, which would have made this wordy description moot. Praise the ongoing mysteries of the goddess!
a handy angle drive
I know from experience that backstops on bottom rails can lead to problems. Many backstops bang up against a small surface of the drawer sides. I decided that it is better to spread this force across the drawer back as with the above example, which inspired me to simply attach a length of pine, properly thicknessed and tested with double sided tape, to a rail with hide glue. In a hundred years or so, we can evaluate its effectiveness. Lastly, the piece received a beeswax finish cut with linseed oil and mineral spirits.

Simianping with drawers
Symmetrical profiles
I thought it would be instructive to examine a simianping that has been gathering dust in the woodshop. I can only suspect that the woodshop chief owns this table but he is as indifferent to its condition as its previous owners. While there is excessive water damage to both feet and top, it manages to hold together despite the many nails that have been pounded into it over the years in vain efforts to repair it. After my rescuing the simianping that was set to the curb, I was interested in this table to learn how the drawers were made and inserted into the structure.
bottom boards and drawer runners

deep socket halfblind dovetail construction

My intention is not to diminish some of the esteem surrounding Ming style furniture construction, but if these photos have such a result so be it. I looked at all four drawers to be certain that I had not pulled out an odd one of the four. The bottom panels have grain running lengthwise front to back locked within plowed grooves as with the tabletop, as with the tabletop, some sides have shrunk leaving gaps. The drawer fronts have deep socket to receive the sides that pass very loosely into their opening.
drawer with bin pull
Paneled drawer bottoms

It was a challenge to photograph the interior due to the low light levels in the woodshop, but honestly, there is nothing to see. The underside of the table is thin deal also trapped into grooves. This surface is all that supports the drawers, one big empty void that the drawers enter and exit. If it's anything, it's simple.
superfluous and problematic extensions
Two additional points are worthy of mention. Very often drawers on Chinese furniture are constructed with sides having an extension at the bottom which is then trimmed for a final fit as a backstop. In some examples I have seen, the extensions are nearly as long as the rest of the drawer so that they might also function to prevent overwithdrawal. Despite the complete absence of anything for these extensions to butt up against, the craftsman added them to all four drawers. Many have been snapped off so evidently this projection represents a weakness. I hold the opinion that the craftsman who made these drawers, the same worker or another working alongside the principal builder of the table, made all drawers in a perfunctory manner, bound by conservative tradition, despite the additional labor and material.   
a pony hoof
There is a common feature of Ming furniture legs that is referred to as a horse hoof, 马蹄脚. This can be compared to a reverse cabriole leg, lending visual weight to the base while maintaining an overall cubic form. It is an extravagance on one level because a much larger stock piece is necessary from which much wood of the leg is cut down to create the horse hoof. This detail perhaps is a frugal innovation or because a sufficient stock piece couldn't be obtained. It has indentations shaped with a curved rasp. It's effective in its execution.

historical advertisement

Promotional calendar

vintage cheongsam

A short time ago, my wife invited me to an exhibition in the Jiangsu Provincial Art Museum. I went along mainly to humor her, expecting very little from this outing as from any museum in China. As it happened, I was pleasantly surprised by a display of early lithographic advertisements from the early republic that detailed the evolution of the modern and modernizing cheongsam which is based on a more squarish Qing era qipao. I strongly suspect that this collection was curated by a Shanghainese due to its high quality although the display notes were only in Chinese. Nearly all the advertisements appeared to be from Shanghai businesses.
Chinese museum quality furniture
Amongst the dresses, calendars with pretty ladies, and vintage artefacts was a full display of a household interior that featured a sort of dressing table. What caught my eye was the poor state of this desk's condition. Not only was it uncleaned, it showed damage and significant loss. I don't want to speculate but there is, in my mind, a connection between the casual state of disrepair in this museum display and the disregard for a table built around the same era (note the similar bin pulls) and neglected in a dank parking garage.


13 February 2018

DTC Coping saw introfit

Work in progress
I finally bought a Knew Concepts coping saw. Of course, I've been lusting after one since I first tried out a model while still working at Harvey. I planned on buying one from Lee Valley and schlepping it back through customs during my last trip to the States. I had to reduce the economic impact of that order for marital reasons and so the high priced piece of aluminum was deleted from the shipment.
During my work developing the children's classes, however, I was introduced to a local Taobao merchant, Plawood, that carries the Knew Concept saws. I was a bit confused and examined the sample attentively, thinking that it must be shanzhai since Harvey has exclusive distributorship on the mainland.
I cannot explain what the business relationship is between Plawood and Harvey, but it's evident that Plawood is selling items imported by Harvey. Is this an example of outsourcing the domestic retail distribution of the woodworking imports? It seems that they might even reexport internationally as long as one doesn't order during the lunar new year holiday. It's yet another market mystery with Chinese characteristics. I was not allowed to leave Harvey with any of the tools that I was encouraged to purchase while there and thus I swore not to ever buy from them again. This latest development somehow carved out a workaround to this dilemma.
Photogenic and visually available
And now with the saw in hand, I tasked myself with making a home for this coping saw inside my toolchest. There is inherently a trial and error approach to this sort of project. Like most tool users with access to the internet, the first step typically involves searching online for other examples of whatever we are trying to make. I don't know whether this method is more inclined to generating inspiration or more about procrastinating. Despite the growing collection of handtools cluttering the DTC since I first built the fixtures to secure my LN saws, I knew that there was still enough room for this addition, but it would be tight fit and a compounded challenge.

My first prototype was meant to take advantage of the strutwork of the frame. I think I was overly influenced by online examples, believing that there needed to be knobs and holddowns with springs or threaded fixtures to make this work.
First internetworthy prototype
Certainly there were many contact surfaces to help support it, but I still needed to find/fabricate some sort of springy tines or turnknobs in order to complete it. I found some springclips for hanging clothes that would have required cutting, drilling, and coating the tips with rubber to prevent from scratching the softer aluminum. There was still some doubt as to whether these would hold securely and not fail over time. This design process endured a few days as I considered possible mechanical solutions, visiting the nearest B&Q to stock up on from their very limited supply of fasteners. But I did get sucked into buying another metric/imperial tape measure and a pump sprayer for the phalaenopses.

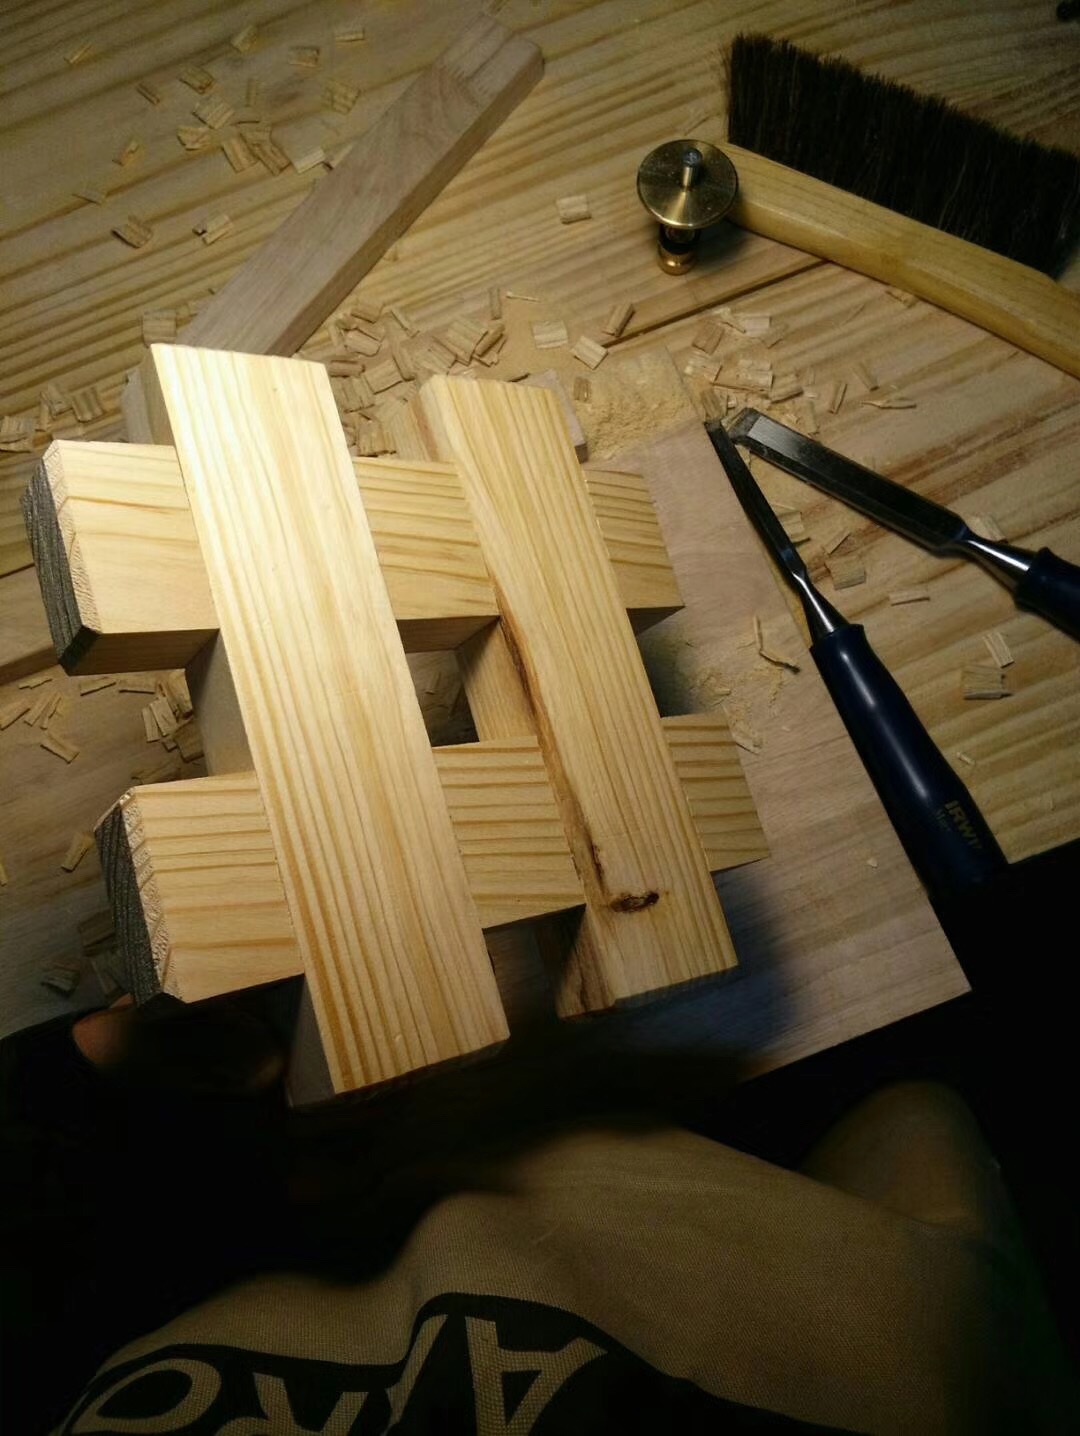
During one of my commutes and inspired by the aetheric spirit of John Harrison, I abandoned this prototype and reimagined another. By the time I arrived at the woodshop, I had the steps in how to cut the fixture plotted ahead mentally. To be clear, I screwed up the first attempt by crosscutting the back of the grooved section, but it was easy enough to make a second which is shown.
Friction fit
I still thought that I needed to apply at least one turnknob at the top, but the friction is enough to keep the aluminum frame secure. With this sort of arrangement, I might need to wait until the summer humidity proves this design's parameters. If there is any excess looseness then, I can readily add some sort of improvised hardware to solve the issue.
layering
It was necessary to undercut the back to allow for the slides that hold the beam to a panelgauge.
The coping saw in its new home
Gongxi Facai!

05 February 2018

Sunday Schooling

applying fresh milk paint to climbing toys
While the recent unusually wintry spell has reduced my productivity in the Pukou woodshop (I usually work until my feet get too numb or the sunlight puts too much of a strain on my diminishing eyesight at about 5:00), I've been engaged in a new teaching venture.  Initially I was interviewed for what was an attempt to promote,  TouchWood, an established Taiwanese woodcraft hobby brand in the Nanjing schools. It's a foreign brand so the director wanted a foreign face. (I cannot explain it but this is so common that the mainland Chinese don't even understand why it's questioned.) There was a lot of back and forth and vague promises about making me famous. I just saw a lot of money being thrown at a project with little understanding of its pedagogical function but backed with the marketing dominance of the Phoenix Publishing head office already well positioned within the school system. The first meeting, scheduled early in the day, revealed a near complete lack of preparation as to its purpose so a second meeting was scheduled in order for me to meet somebody who understood something.
Wang Meng's ukulele kit assembly class
And at the second meeting I met Wang Meng who was operating a little woodcraft boutique across town while also a university instructor. I think that I've mentioned this phenomenon. There are little shops for leathercraft, cake decorating, pottery, and other sundry activities with varying degrees of competence. I didn't see much in his shop that stood out, but he did express an interest in working with me to develop more 'instructional' classes for children. He gained my confidence by expressing an understanding of my objections to the Phoenix approach with TouchWood. And so for the last few weeks, I have been collaborating to create new classes that fit within the constraints of a woodshop installed on the 31st floor and the constraints of students with short attention spans. 3 hours.
Childsafe saw proving difficult for a child to use
Painterly


Phoenix is also a distributor of many foreign brand educational toys. We were given a supply of childsafe tools from Corvus. The easiest way to describe their products is that they make dull edged tools. It's clear that a saw that cannot cut tender flesh can no more even cut softwoods. It became evident early on that we needed to upgrade the supplied fretsaw blades if we ever expected students to complete their projects in the allotted timeframe. I suspect that Phoenix was planning to sell such tools to hyperanxious Chinese mothers. I'm surprised, though, that there are enough German mothers to have initially created a market demand there. Do any German parents give their children dull knives, too, when teaching them how to do kitchen tasks? 
Motherly pride
Although I should not have been surprised, it was made manifest throughout the day that parents were as keen or moreso to participate in learning about woodworking. Some of this can be attributed to the children's short attention spans and low motor skills, but it can be more easily explained by adults who were denied such opportunities in their own childhood. I concluded with Wang Meng that if we saw that the parents were happy, then we could be confident that we had done well with the classes.  And yet there is also an element of Chinese parenting that sees every aspect of their childrearing as a competition for their children's future. Two mothers, in particular, exhbited this kind of anxiety.
helicopter woodworking

body language
But overall, most parents enjoyed themselves along with their restive youngsters. These photos were taken during two sessions conducted on the 4th of February, 2018 of our first class offering.
Mother and strings

Joy from playing with toys made by one's own hands


Demonstrating some mysteries of milk


There will likely be more class offerings after the Lunar New Year festival. Gounian kuaile, dajia!

28 December 2017

Christmas gifts misgiven

Seasonal wood movement and season's greetings

I regularly make Christmas gifts. Some years the items come from the kitchen, but this year I again had access to a woodshop. I distributed some of the stools from the milkpaint openhouse to parents with young children. These were begrudgingly accepted in the spirit of the season. I must have been falsely expecting more enthusiasm for handmade furniture.
It must be the thought that counts this year
I made a set of candleboxes and included the hotpad from the most recent class. These pieces along with a few other Chinese themed gifts were picked up by an employee of a parcel delivery company. A few hours later, my wife then received a call from the head office explaining that wooden items could not be sent to the USA because they might contain a virus or caterpillars. It's good to know that China is vigilant when it comes to proper phytosanitary procedures. I feel safer already! Merry Christmas, Dad.
pegged battens

Meretricious inkwell drawer


Lastly I got around to making a lapdesk, following a pdf file, which I once came across online, from Christian Becksvoort, found so long ago.  This project seems to have become a fairly common build. The main challenge of this piece is getting thin stock to stay flat. The battens on the lid are a definite necessity. I had the small inkpot drawer sliding smoothly in the woodshop, but having been brought into a heated apartment, it now sticks.
Somebody has found a use for this one
It's mainly a decorative feature, truth be told. I think that I was subconsciously motivated, in part, to construct this casework because it presented so many opportunities to use up little scraps of various tropical hardwoods that I cannot stand to see wasted. The goddess, Moulariprionia, shares her blessings of creativity with those who do more with less. It was a fun challenge and I have already dimensioned stock for a second build. Shengdanjie kuaile!

Zambian highlights

                               
   Shengdanjie kuaile!
Hongmu edge banding


21 December 2017

A bookcase of necessities

In the raw
Frequently it behooves a woodworker to build something that will stand as convincing evidence to settle impromptu disputes with regards to the amount of money spent on tools, books, and other necessities of life. It followed, therefore, that I needed to build a bookcase to house my ever growing book collection, which can stand in the livingroom to create a more peaceful home environment. I bought Schwarz's The Anarchist Design Book primarily for his information on seating furniture, but as it happens, I followed and completed the plans for the boarded bookshelf first.
I don't know whether I reached the conclusion from experience or from one of Schwarz weblog postings that he wrote during the writing and research on the book, but I knew that I preferred fixed shelving. I won't bother with my own reasoning since the Kentuckian lays out his case fairly well. I'll go through some of what I have learned in making this piece of basic carcase construction and point out my own variations and the one place where I think Schwarz's design can be significantly improved.

The first point that requires attention is that this is a large piece, larger than most projects for those who primarily use handltools. It requires a correspondingly large assembly area and adequate tools to the task, which I learned conclusively that I didn't have. Because of the nature of globalism, I was only able to buy a single 48" parallel clamp and 3 at 36" from a Taiwanese distributor. At least, I thought I bought the 36" clamps, but the maximum capacity as I learned from making this piece is 31", which is what I had to cut my final width down to, removing 5" from the 3 shelves.
15" of excess beech banded shelving
But it's easier than trying to cut boards longer after discovering a snag in the middle of construction. Only because there was somebody else in the woodshop making tabletops from imported beech, did I have a handful of strips which I then glued to the edges of the shelves with the expectation that this will reduce problems with abrasion and denting. This detail is not intended to be equated with the dropped edge that Schwarz mentions. That construction method limits the height capacity of the shelves with little structural benefit in my opinion. I chose nominal dimension pine lumber for this piece because that is what I readily can obtain. This required glueup to make the 13" sides that Schwarz recommends. After resawing to approximate thickness, adding the beech strips was just another part of the process of sizing the major stock pieces.

Clamping up the three shelves into their corresponding dadoes is an acrobatic challenge even if all the pieces are uncupped and perfectly fitted. Trying to apply warm hide glue beforehand only adds to the complexity. I found that I could partially assemble the shelves and then allow some hide glue to trickle into the joints before tightening the clamps. Because I was working in an unheated workspace, I squirted some hot water into the joints to help the glue flow down the full length. The main function of the glue at this stage is to hold together the assembly until the nails are driven in.

Gluing the kickplate to the main ssembly
Schwarz made his bookcase in a minimalist, modernist style, eschewing ornamentation, except beaded backboards, and moldings. This makes construction fast and easy, yet it also allows for individualist flourishes to express themselves. I decided that the bottom kickplate merited some attention. It helps to provide rigidity to the bottom shelf and squareness to the carcase. If I make this piece again, I will trim it just above the floor level. As it is. I assembled the kickplate proud, gluing it in the dadoes and to the lowest shelf, planing it flush afterwards.
Playing card shims
the historically accurate back

Rabbeted top rail back discreetly receiving the backboards
There is one element of the boarded bookshelf design that I suggest be altered to improve the function and simplify the construction. I think that this detail also follows more closely to the handicraft tradition. After resawing construction lumber to dimension the 3/4" stock, I was left with stock that I used for the shiplapped, beaded backboards. There was severe cupping in this waste stock, which I split before surface jointing. The backboards are effectively random widths, ripped to create stock without voids nor problem knots. The thinner stock was rabbeted with a tablesaw on the backsides and the thicker stock was rabbeted and beaded  on both edges with an upgraded Veritas plowplane and beading blade to the frontside. These pieces also received dadoes to receive the shelves, lending support and stiffness to the frame. I chose to make a top rail with a rabbet along the back for two reasons. It hides the back completely from view. More importantly, it saves effort and material when attaching the backboards, allowing the use of odd lengths that don't require a flush edge along the top since it is tucked underneath the top rail. I also made the top rail cap the ends, covering any potential gap in a clear line of sight. This type of top rail also gets inserted into a rabbet in the sides rather than a dado, which immensely simplifies the joinery. Even in perfectly clear stock, cutting out a rabbet is easier than chopping out a groove.
The knot around which the bookcase was constructed
A dimension of the top rail is specified as 4" wide. This also happens to be the same width of the kickplate so the number was likely chosen to keep the parts list easy to remember. While the kickplate's is determined by the height of the lowest shelf, the top rail's width isn't so constrained. The wider the top rail can allow for using shorter length of backboards; if the top rail is too wide, however, the beaded back details will appear out of place. I chose to allow a defect of the stock to determine the width. I chose to stop the rabbet on the sides that receive the top rail just above a knot to avoid the difficulty of paring close. I let the tree determine the final appearance.
a painterly effect
I always intended to paint this piece. Pine and other softwoods lend themselves to painting despite recent trends and modern aesthetics. The idea to paint the stripes on the highlight the dado joints came to me as a means for obscuring the nail heads. Milkpaint doesn't adhere to metal surfaces reliably well. I use Tremont nails, which are effective fasteners but not decorative. And with the paint in hand, the muse, Moulariprionia, casually whispered to me: "it will be ever so lovely to paint a false leg detail along the side bottoms." And she's correct with her guidance as usual. I chose iron oxide black to hide the nails because I had the pigment in stock, but in retrospect, I think the Umber/Sienna pigment would be more appropriate. The trompe l'oeil lightens the mass of the piece.   

Completed and awaiting a librarian's touch as soon as the BLO has dried


27 November 2017

Last class of 2017 in this cold, dark world

Instructor and students

This past weekend, November 25-26th, I guided a couple who teach English courses at Hohai University through the A1 class, which covers marking a lapjoint, sharpening, and a strong grounding in handsawing. They live a subway stop away from my apartment and I have come to know them through playing ultimate frisbee. Both budding woodworkers made comments as to how much they appreciated my teaching style. This touched me since pedagogical skills, especially to foreign teachers, are seldom positively acknowledged in China.

Proper use of paring chisel

Bench sawing


They shared with me some of their frustrations as teachers and working within the mainland Chinese education system. They wanted to know how long I had been doing woodworking, I explained that I had started at 13 in a middle school class. Their only equivalent example was learning about welding in a high school physics class.
Table mat

demonstrating a combination square to verify a sawcut

These two happily concluded the class and posted these images on their own WeChat photostreams. During the ride back home, they mentioned plans for wanting to convert their garage into a functional workshop. I'm looking forward to collaborating with these two.
Christine's husband's posting

Kevin's wife's posting
If you're not on WeChat, then where are you?