Showing posts with label frugality. Show all posts

02 November 2020

PRC made leatherworking handtools with Chinese characteristics


MSGA: Make Shoes Great Again!
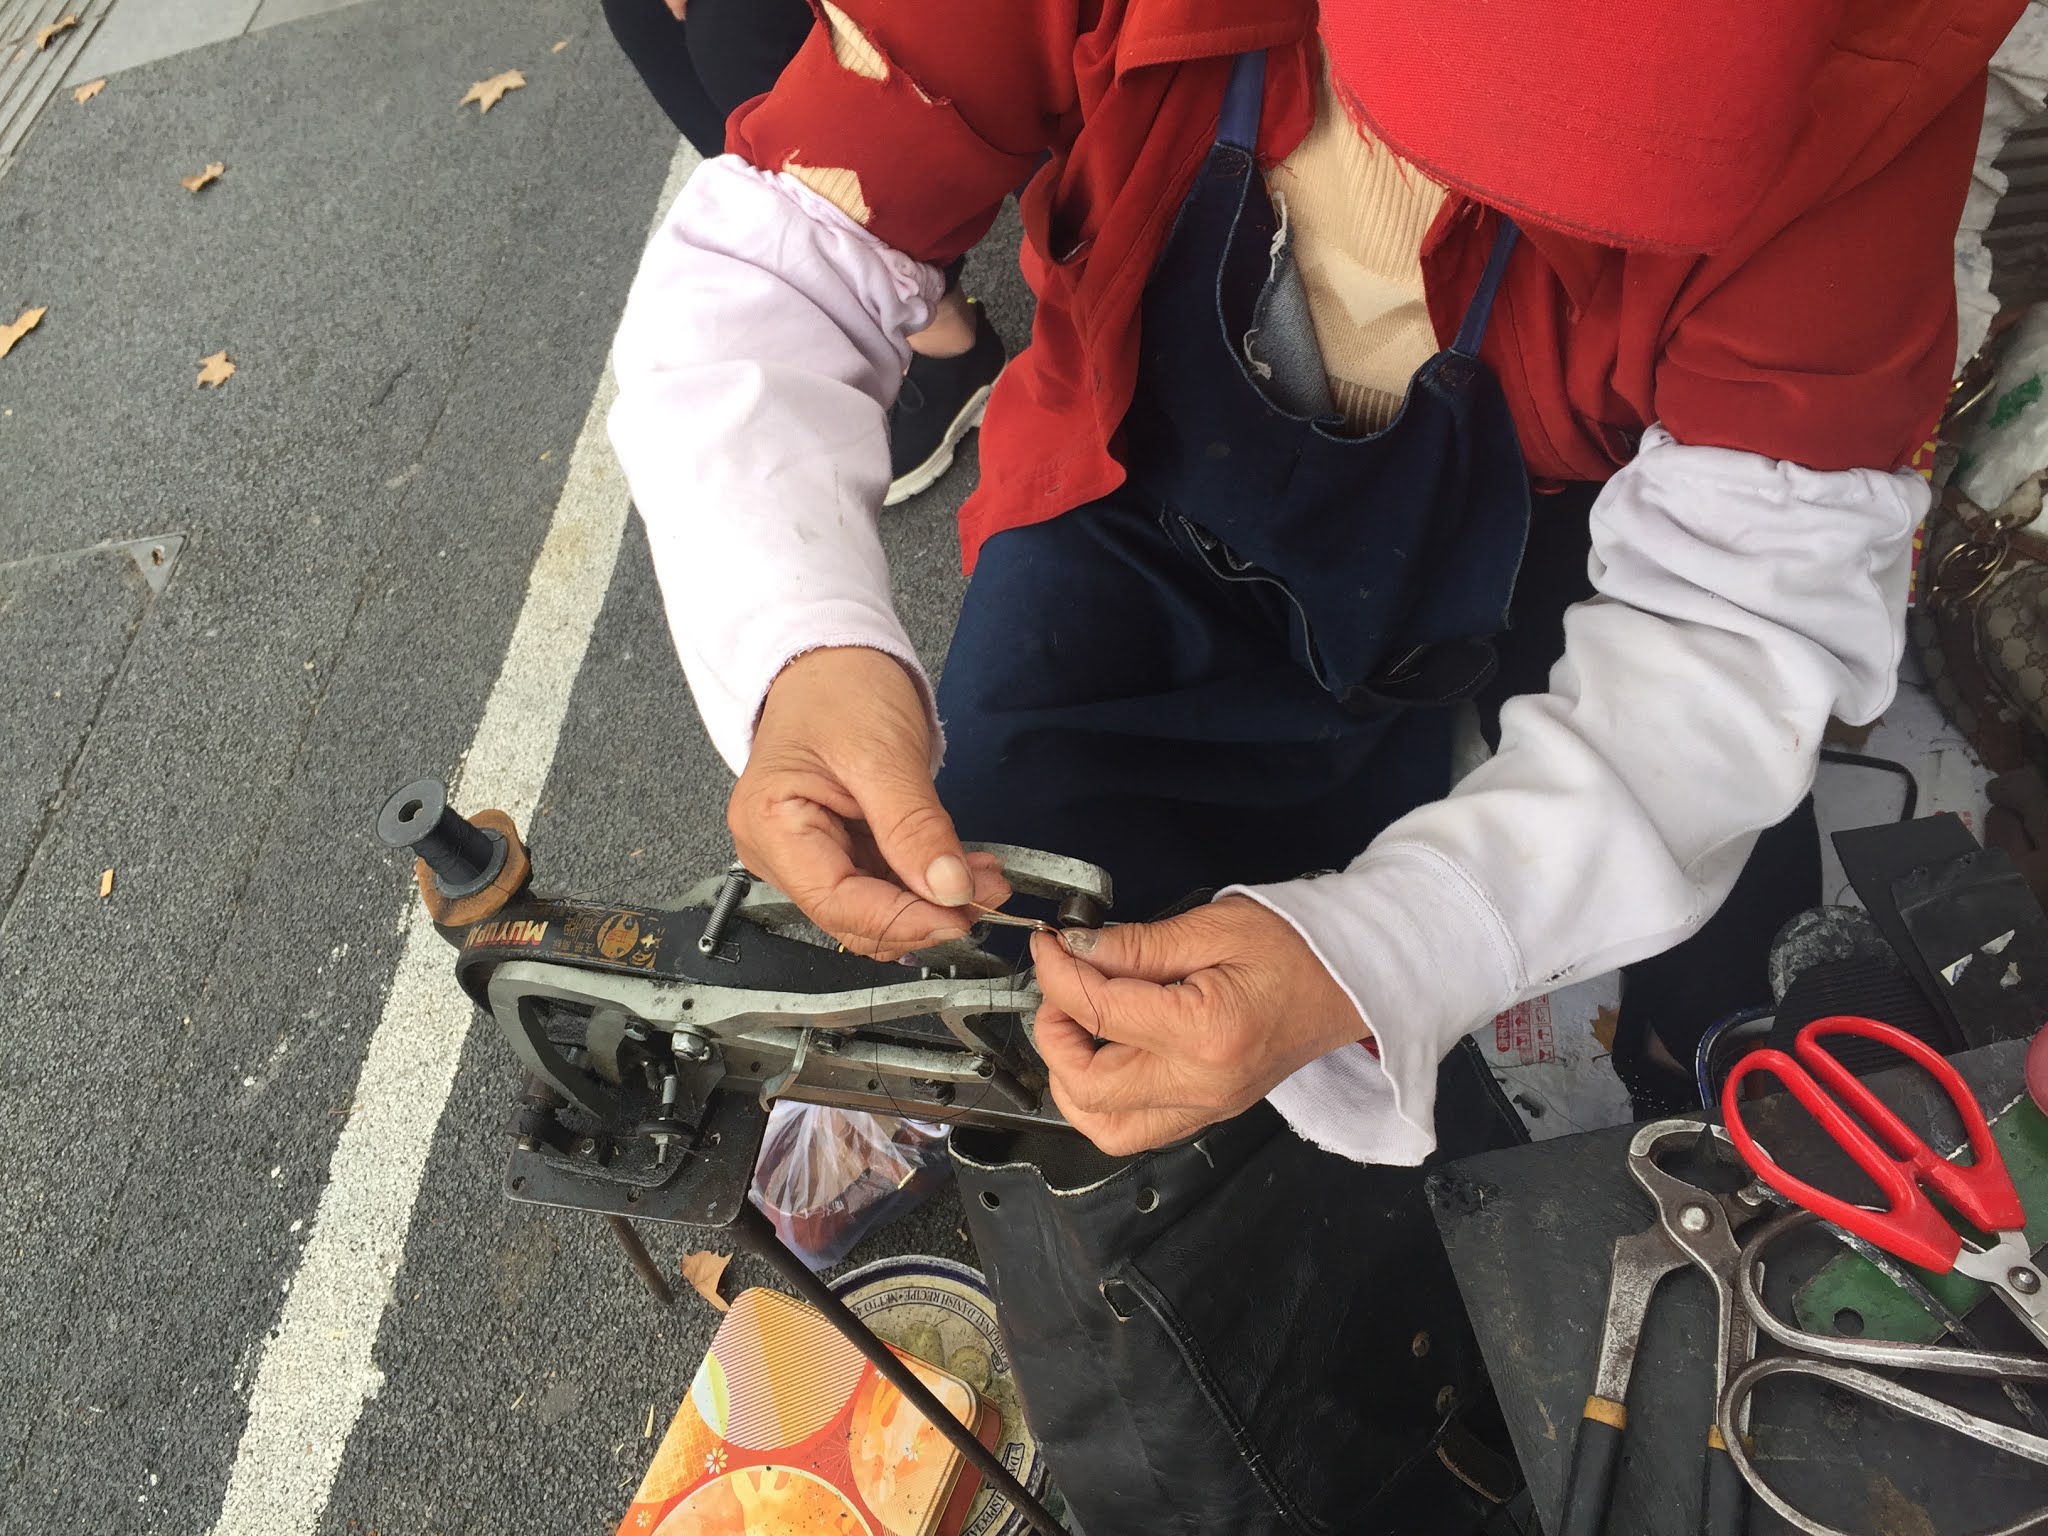
A serendipitous confluence of events led to this post. The purchase of an obscure brand of sewing machine with very little online references allowed me to begin repairing my own clothes again with ambitions of making new items. I began looking at my Turkish bought backpack in a new light, newer than the light I gazed upon it when I first repaired it years ago under different circumstances. And so while perusing the internet and Youtube to learn about my new sewingmachine's workings, I came upon an unboxing video of a PRC made leather stitching machine, which I have spotted on many a street corner over the last decade.  I've come to learn that this is device is a copy of a patent model first manufactured by the Bradbury Sewing Machine Company, also known as the A1 Repairing model.  Even though I've been interested in handtools and, in particular, humanpowered machines, I dismissed this crude device because of my first experience with one. In my first year with the help of some university students, I approached a cobbler to repair a black leather wallet. He choose to reinforce the stitching with what can best be described as mylar fishing line. More than a decade later, happenstance returned me to the topic. 

Privileg, only slightly less obscure than my Edgemere

Surprisingly difficult to find domestic sewingmachine repairshop

As I set out to bring my backpack back up to snuff, in the process I decided to investigate as well I could this handdriven machine from a local perspective. As it happens, my wife was already familiar with a cobbler who has made her living outside the gate of the campus where her father obtained a position as a professor.  

                                                
Stitching and threading 

I arrived with my backpack in need of some stitching along a failed seam and a list of questions that I imagined would appeal to the many new overseas owner of these popular machines. I recorded a video clip as she restitched for me and further watched as she repaired soles, replaced zipper slides, and restictched damaged handbags until my wife returned from her errand to act as interpreter. 

No fancy pinstriping, decal transfer


Note: No numbers for year nor month
Rethreading again during the seam repair
 I asked about the different brands and models and why she settled on the MuYuPai brand. She explained that it was her first machine and that it's the only one that she has ever worked with so she cannot compare to others. She began her trade in 1982 when she was 12 years old and has remained at this location since then. I asked about any modifications that she makes to improve performance and what the weaknesses of the designs that she discovered. Her responses emphasized just how foreign my questions were. The machines that she was using was the third and that it was already two years old. She didn't alter the machine from the factory in any way. As for principal weaknesses, she said that eventually there are just too many problems with the machine and then she just buys a new machine from the local dealer the address of which she held a secret. Just because. 

After 30+ years of staking out a corner, a painted outline

Restitching after adding a new zipper slide

Heel repair while a customer awaits in socks

                                 Traditional curbside cobbling 

In the end, I discovered that anybody interested in how to maximize the potential of this low priced device can quite readily learn more from Youtube and other online resources than I could have learnt from a cobbler who has used it during her ongoing career lasting nearly 40 years.  I noticed that her stitches were not parallel to the edge and sure enough, there is a Youtuber with a method for adding a stitching guide to a similar machine along with others which highlight how to improve its function. 

Manufactured and marketed locally
 The Chinese name for this is θ‘₯ιž‹ζœΊ (Bu3xie2ji1), literally repairing shoes machine. Entering this term on the Taobao website produces a slew of similarly low priced devices. If you want a place to begin learning more about these machines, here is a website in Chinese. 

It follows that a nation that manufactures so many lady's handbags, luggage, and counterfeit bicast apparel and boots also manufactures the machines to make those handbags. I haven't dived into this recent phenomenon as to why so many crafters are buying these cheap cobbler's machines from the PRC but despite the simple fact often stated by new new owners that they are astoundingly cheaper than vintage machines of superior quality manufacture, I finger Amazon as the main cause for their arrival and proliferation. 

A definite upgrade

Frankly I think that anybody who wants to do quality leatherwork with a super cheap starter machine gets as much as he pays for regardless of green marketing appeals. Leather is certainly not cheap so why risk working on costly raw materials with such poorly made tools when for a few $100s more, no need for fettling a new purchase, sturdy bases, replacement parts in stock, higher resale value, and with an option to motorize at a later date, higher quality models are available here.

But I digress. Back to the backpack repair: 

While shopping in Shanghai for threads, elastic, twill tape, cloths, and other sewing notions (because Nanjing is too small to support such comprehensive markets) I discovered a source of hardware fixtures. The challenge as so often is finding what is needed; the prices on the items are usually negligible.

Pennies to purchase; dollars to find

Hardware selection

Luxury buttons

Fabric market

Leather goods workshop
And so I had the necessary items on hand already after getting the cobbler to restitch.   I had to recover the carrying handle so I stitched tow lengths of overlapped woven tape and then stitched that to the original core. I basted it first but it was still a struggle to machine stitch. I then topstitched together wo lengths of the woven tape to replace the shoulder straps. The replacement brass Chicago bolts were much easier to use than the split rivets I had used to repair the backpack that failed almost immediately after I began using it. 
Mega piping

Material failure

Copper split rivet and washer


The lower buckle tab had failed in the same way as the upper one had years ago which I replaced with real leather from a charity shop purchased belt, which still remains functional and looks the same as when I attached it.  I decided that instead of replacing with leather as before, since I didn't have tools for punching holes, I would use a length of twill tape and make eyelets with one of my recently purchased threads! 

Reattached handle and shoulder straps

New drawstring and locks
I had tried to buy buttonhole quality spun linen but some items still elude me and this lower pocket receives very little usage and hardly any stress so in the spirit of Kintsugi, I chose a thread that would highlight my hand stitchery. I reviewed the process on YouTube, of course, and was reminded that many eyelets merely rely on a satin stitch, I opted instead for a buttonhole stitch since I wanted the extra loop to help keep the parted twill weave open during and afterwards.

Replacement twill tape

eyelet holes

buckled and secured

 I think it turned out okey and able to withstand another decade or more of regular wear.  

Rear view

Laggard's view

Service while you wait
 

Happy All Saints' Day, infidels and true believers! πŸ™

13 February 2018

DTC Coping saw introfit

Work in progress
I finally bought a Knew Concepts coping saw. Of course, I've been lusting after one since I first tried out a model while still working at Harvey. I planned on buying one from Lee Valley and schlepping it back through customs during my last trip to the States. I had to reduce the economic impact of that order for marital reasons and so the high priced piece of aluminum was deleted from the shipment.
During my work developing the children's classes, however, I was introduced to a local Taobao merchant, Plawood, that carries the Knew Concept saws. I was a bit confused and examined the sample attentively, thinking that it must be shanzhai since Harvey has exclusive distributorship on the mainland.
I cannot explain what the business relationship is between Plawood and Harvey, but it's evident that Plawood is selling items imported by Harvey. Is this an example of outsourcing the domestic retail distribution of the woodworking imports? It seems that they might even reexport internationally as long as one doesn't order during the lunar new year holiday. It's yet another market mystery with Chinese characteristics. I was not allowed to leave Harvey with any of the tools that I was encouraged to purchase while there and thus I swore not to ever buy from them again. This latest development somehow carved out a workaround to this dilemma.
Photogenic and visually available
And now with the saw in hand, I tasked myself with making a home for this coping saw inside my toolchest. There is inherently a trial and error approach to this sort of project. Like most tool users with access to the internet, the first step typically involves searching online for other examples of whatever we are trying to make. I don't know whether this method is more inclined to generating inspiration or more about procrastinating. Despite the growing collection of handtools cluttering the DTC since I first built the fixtures to secure my LN saws, I knew that there was still enough room for this addition, but it would be tight fit and a compounded challenge.

My first prototype was meant to take advantage of the strutwork of the frame. I think I was overly influenced by online examples, believing that there needed to be knobs and holddowns with springs or threaded fixtures to make this work.
First internetworthy prototype
Certainly there were many contact surfaces to help support it, but I still needed to find/fabricate some sort of springy tines or turnknobs in order to complete it. I found some springclips for hanging clothes that would have required cutting, drilling, and coating the tips with rubber to prevent from scratching the softer aluminum. There was still some doubt as to whether these would hold securely and not fail over time. This design process endured a few days as I considered possible mechanical solutions, visiting the nearest B&Q to stock up on from their very limited supply of fasteners. But I did get sucked into buying another metric/imperial tape measure and a pump sprayer for the phalaenopses.

During one of my commutes and inspired by the aetheric spirit of John Harrison, I abandoned this prototype and reimagined another. By the time I arrived at the woodshop, I had the steps in how to cut the fixture plotted ahead mentally. To be clear, I screwed up the first attempt by crosscutting the back of the grooved section, but it was easy enough to make a second which is shown.
Friction fit
I still thought that I needed to apply at least one turnknob at the top, but the friction is enough to keep the aluminum frame secure. With this sort of arrangement, I might need to wait until the summer humidity proves this design's parameters. If there is any excess looseness then, I can readily add some sort of improvised hardware to solve the issue.
layering
It was necessary to undercut the back to allow for the slides that hold the beam to a panelgauge.
The coping saw in its new home
Gongxi Facai!

28 December 2017

Christmas gifts misgiven

Seasonal wood movement and season's greetings

I regularly make Christmas gifts. Some years the items come from the kitchen, but this year I again had access to a woodshop. I distributed some of the stools from the milkpaint openhouse to parents with young children. These were begrudgingly accepted in the spirit of the season. I must have been falsely expecting more enthusiasm for handmade furniture.
It must be the thought that counts this year
I made a set of candleboxes and included the hotpad from the most recent class. These pieces along with a few other Chinese themed gifts were picked up by an employee of a parcel delivery company. A few hours later, my wife then received a call from the head office explaining that wooden items could not be sent to the USA because they might contain a virus or caterpillars. It's good to know that China is vigilant when it comes to proper phytosanitary procedures. I feel safer already! Merry Christmas, Dad.
pegged battens

Meretricious inkwell drawer


Lastly I got around to making a lapdesk, following a pdf file, which I once came across online, from Christian Becksvoort, found so long ago.  This project seems to have become a fairly common build. The main challenge of this piece is getting thin stock to stay flat. The battens on the lid are a definite necessity. I had the small inkpot drawer sliding smoothly in the woodshop, but having been brought into a heated apartment, it now sticks.
Somebody has found a use for this one
It's mainly a decorative feature, truth be told. I think that I was subconsciously motivated, in part, to construct this casework because it presented so many opportunities to use up little scraps of various tropical hardwoods that I cannot stand to see wasted. The goddess, Moulariprionia, shares her blessings of creativity with those who do more with less. It was a fun challenge and I have already dimensioned stock for a second build. Shengdanjie kuaile!

Zambian highlights

                               
   Shengdanjie kuaile!
Hongmu edge banding


21 August 2017

Refactoring a Chinese table part 2

Despite my worry that I might not be able to reassemble a new table leg with the crossed tenons, I found that if I compressed the ends of the tenons with a channel lock pliers with padded jaws, I gained just enough leeway to be able to drive the tenons in.
First testfit
Testfit revealing uneven gap across the miter

I testfit both sides in turn before attempting to assemble the whole base. My best guess is that the tenons were originally left long and cut flush only prior to finish application. There was what appeared to be interference with the miter joint on the upper register, compelling me to trim it a bit although this seemed to do little with tightening the joint but the gap was consistent. With so many connecting points in this piece and difficult to recover reference points, I resigned myself to accepting that just getting the table back in order was my goal, not creating tightly fitting joints, which might not ever have been consistently tight. A point worth mentioning is that the leg bottoms were not chamfered, exactly where chamfers serve an important function to prevent splitting. I have no explanation for this detail, but I followed its precedent in the new leg.
new leg in veeblocks

I then set up the new leg on the bench in joiner's saddles to chamfer the inner corners that correspond to the chamfers of the skirts. The outside arris received only a slight roundover. The inside arris has the edge minimally softened.
A hipster version of Mr. Clean
The next task was to clean up the surfaces of accumulated crud and schmutz. I don't have any access to conservation grade supplies so I chose to use a cleaning product that I found in a local supermarket. I tested it first on the broken leg. It didn't cause any staining so I attacked the main table with it and some new abrasive sponge pads.
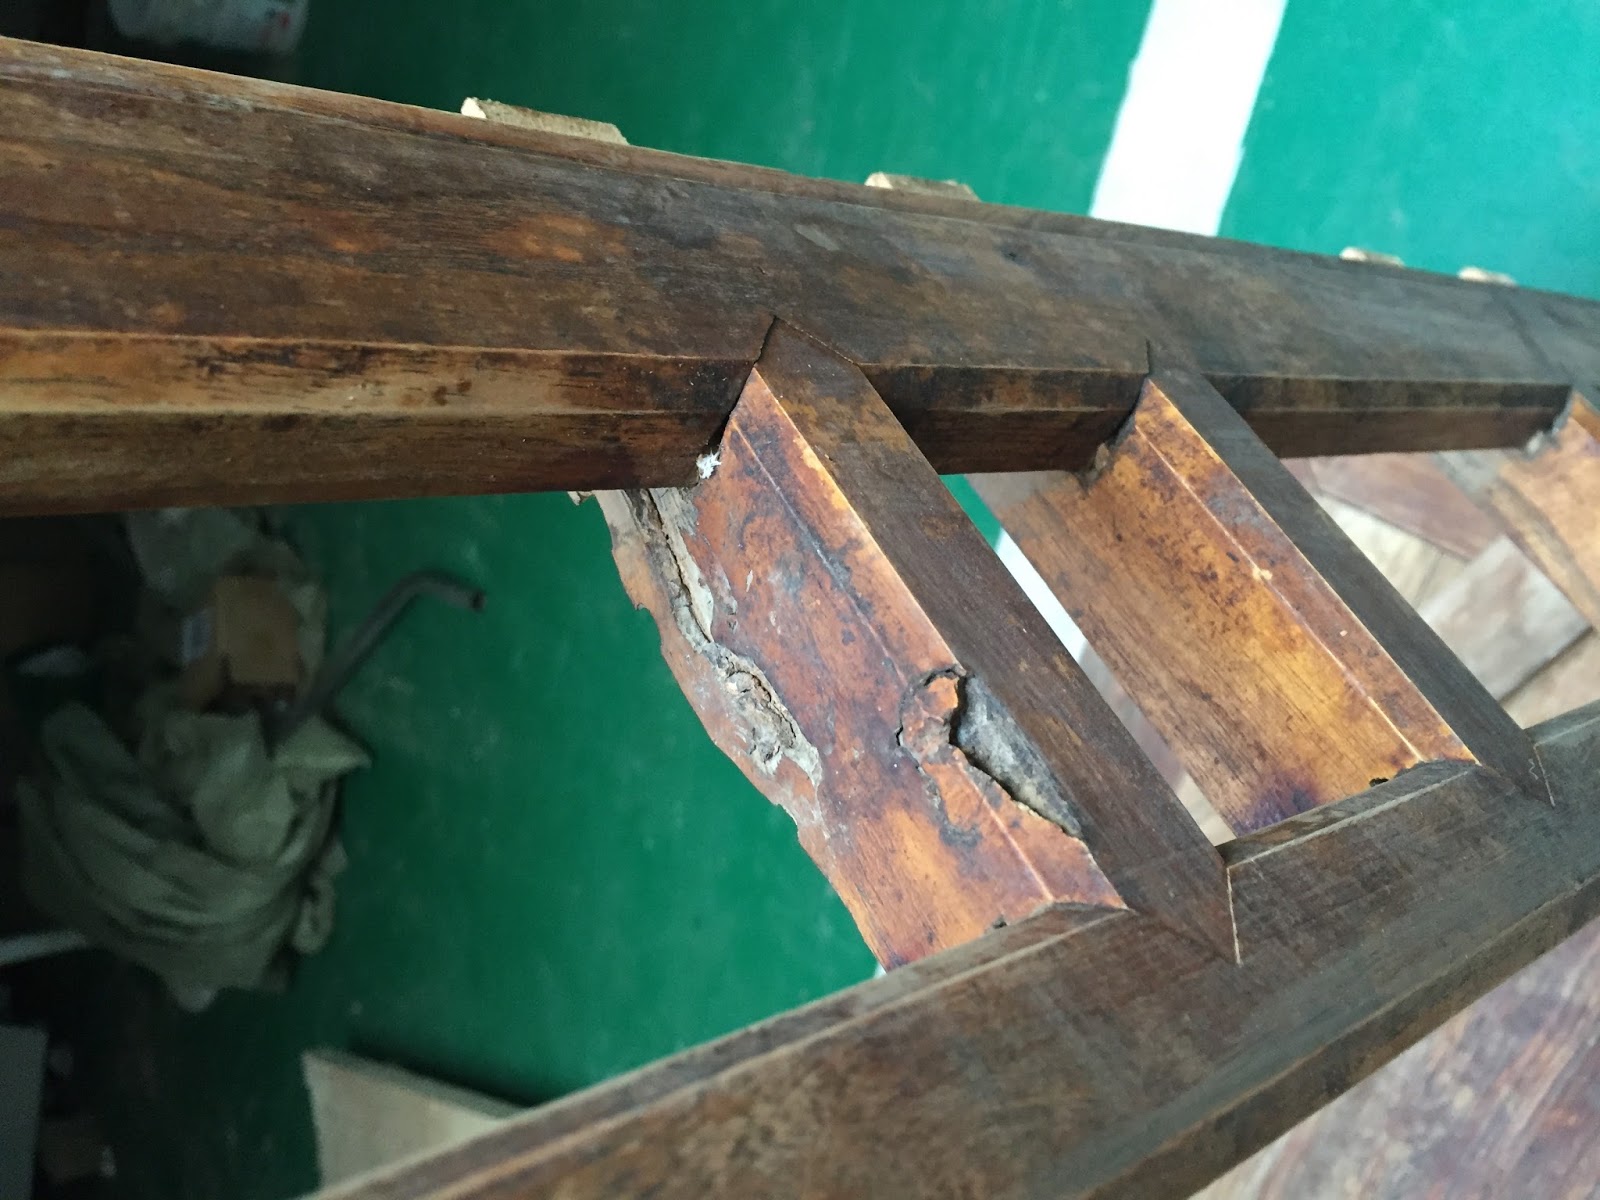
Going over the finished surface made me examine the table as  whole more closely. I started to see just how of poor quality the original stock was for this piece. While it's true that many of the defects were oriented to the inside, that wasn't always the case. Additionally three of the four original legs have boxed heart centers. Resultant checking and holes from the pith were evident.
Knots on broken leg

Checking and pith loss in boxed heart stock


I know that every workman must balance his inputs (labor and materials) with what he can expect in terms of price for a finished product. This piece, however, seems to have incorporated every marginal stick of lumber on hand. There is not a single piece of lumber in the base that does not display evidence of insect damage, wane, checking, or other defects. While tabletop outer frame is made of by far the best selected pieces (the boards in the center of the tabletop show pith loss), these four boards are also the most crucial of the whole assembly.
Loss in verticals

Pith loss

Powder beetle damage

Rough sawn marks left unplaned on exterior surface

A lesson from this restoration is to understand just how rickety and shaky such a base is without a tabletop to lock it all tight. The strength and mass of the tabletop holds 24 tenons together in its perimeter. I don't think that I've encountered such a complex piece that relies so much on four sticks of wood not failing in function to hold together all the joinery of the whole. It's a mystery why craftsmen of this genre never chose to use pegs to stiffen the joinery. It would certainly be applicable to do so where the upper register intersects the legs. It would also reduce the strain on the leg tenons intersecting and closing the butt miters of the tabletop frame. It's evident from this adhoc repair that the craftsmen were aware of the application of pegs.
Original pegged repair to control split in open mortise
Wedged throughtenon in cross member
 The cleaned table surfaces reminded me that the choice of finish is often more about unifying many different wood species than it is about creating a protective cover. I cannot do any testing, but from experience, I would describe the original finish as a colophony based varnish with added darkening tint.  The dark varnish serves a dual function. Besides unifying the varied wood species used for this low end piece, it fools the eye into thinking that the table is made from a high value tropical hardwood traditionally used in HongMu furniture (ebony, rosewood, etc.). And more cynically, the finish also helped to obscure the many flaws in construction and selected stock.

Pith loss and color contrast once obscured by tinted finish

Cigarette scorches formerly obscured by tinted varnish
It's especially difficult to generalize from this one experience. I have seen other Chinese make efforts to restore and conserve traditional furniture forms, but it's not common. In fact, this is the second simian ping table in the woodshop now. The first one caught my eye until I notice that it had been riddled with finishing nails by a previous conservator. Finding such a piece just a few doors from the woodshop could be attributed to amazing luck or it might be an indication of just how disposable these traditional pieces are thought of by contemporary mainland Chinese. It might be due to a lack of skills generally that can explain why these pieces get tossed to the curb without much fuss. I also accept that these pieces, while amazing examples of workmanship, were, at best, midlevel items for utilitarian purposes. They are not made of the high value tropical hardwoods, which are often the main factor in determining their intrinsic value by Chinese consumers. Lastly, there is a general thought among most mainland Chinese that old things are bad and new things are good.
New wood integrated into old

Refactored table
I've learned now to better understand why so many student projects follow such a narrow range of characteristics. In the mind's eye of mainland Chinese, the simian ping table form is how they think of a high quality table. Here are a few examples of tables made by woodworking students.
Traditional overhanglessness

Qing style coffeetable in black walnut

They employ more simplified joinery, (often biscuit joinery), and modern adhesives but they still carry with them long established features of a simian ping, three way flush surfaces and as little tabletop overhang as possible. And yes, in their focus on this form, their pieces display compromises in joinery and a failure to consider wood movement, pushing similar problems into the future.

Disappearing legacy
A time back, I came across this piece also put to the curb for public removal.  At the moment, I had no place to move it into and no ready means for transporting it. I was able to look it over after taking this single photo as rain was imminent. One of the rear legs was broken, but it was a repair that could have been managed without much difficulty.  More importantly was the function of this piece. I don't know the Chinese name but I call it a foodsafe, an invaluable household item in days before the availability of electric refrigeration.  I could see that it was a handmade item, intended to be a centerpiece of a living space, but I doubt it was as old as the table because it contained low quality particle board. Although one section featured a sliding glass door, the rest of it was enclosed with window screen that had rusted. Despite these parallel compromises in handicraft, I regret not rescuing this piece because I think it represents a more valuable example of material culture and one that will never be preserved in a Chinese museum.
In the USA and doubtless in other countries, the equivalent of this piece, a generic piesafe can be still found in many homes either as family heirlooms or bought from an antique dealer. It's even possible to buy new pieces that evoke this form.Nobody, I doubt, would use them as their intended function, but form and nostalgia keep them from being turned into firewood or landfill.