I had a partially finished floor toolchest mocking me for about 5 months, taking up space atop two sawbenches. The plan originally called for sourcing some locally produced strap hinges to complete it and that could also be used for Dutch toolchests, potentially another class offering. The feedback I received from the inhouse sourcing manager was that he had found one manufacturer which was willing to make the hinges as long as we paid for the development costs and placed a minimum order for 1,000 items. Buying goods made in China, it must be repeatedly pointed out, is very often so much easier outside China than from within. For this reason and another pressing deadline, I decided to just proceed with butt hinges sourced myself at B&Q.
In the meantime I had purchased Christopher Schwarz's TATC and was using it as a handy guide for this project which is based on a 6board chest. I had built my first 6board chest while working for my previous employer, also with the goal of developing it as a class project. While still in university, I built my first toolchest from a set of plans drawn by Carl Lynch, not the Duncan Phyfe model, but another. It was very much like the floor chest that Schwarz uses as the foundation for his TATC.
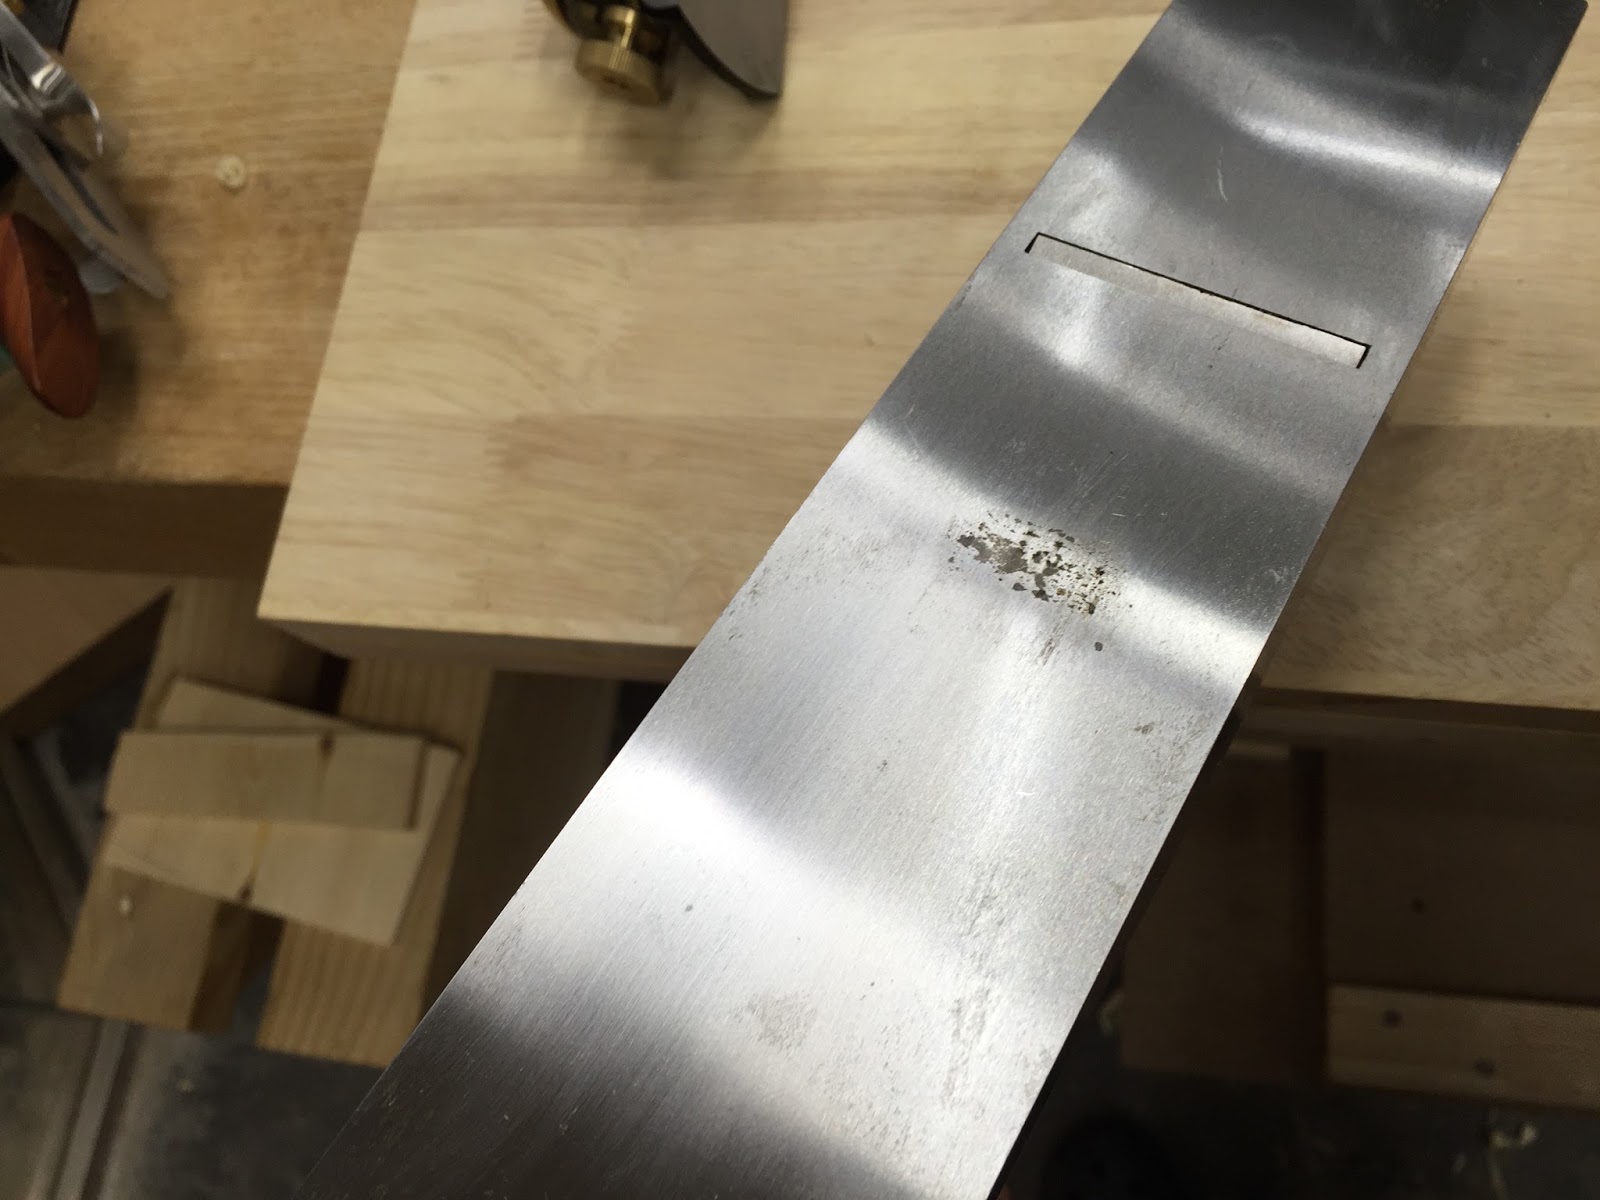
Putting together a 6board chest is straightforward enough as long as the necessary wide pine boards can be had. I had to settle for the SPF and SYP that my employer begrudgingly provides me. The widest that I've seen is a 2x10. The last lot of SPF was of a species that might be some sort of fast growing hybrid, adequate for rough construction, but woefully lacking the quality for carcass joinery compared with white pine. And while I love working with SYP, at least, what can be bought in China, possibly due to overzealous kilndrying in order to meet phytosanitary requirements, has a tendency to unpredictably express suppressed tensions within the fibers. It's a material that screams out for therapy.
 |
| Warpage after rippage |
 |
| Internalized stress, I can sympathize |
I think that this lag while waiting on the arrival of the never to arrive strap hinges allowed me to sort out more carefully the lid construction details from Schwarz. I was mostly interested in the idea of a lid support using the lid skirt cut in a way that it rests on the dust seal. He does provide some details of how to construct this feature, just saying that it can be done and showing a photo to save him from having to write out in details.
You can saw a bevel on the waste [of the lid skirt] to produce a way to stop the lid from opening all the way and hitting the floor. The photo shows this better than words can explain. If your dust seal is in the proper place, then leaving the tip of the waste about 7/16" to 1/2" should make a good stop. p428
The photo on the opposing page in the book shows a tiny wedge of wood precariously pressing back into a rear edge of the top skirt. Was that bevel left 7/16" or 1/2" long from what reference point, sir? Perhaps because he realized that his book's publication date was so long overdue, he then explains just how bad an idea it is to expect this kind of stop to actually hold up a beefy lid and further suggests that the lid be supported with a chain stay. He writes in more
details about buying chain from an unnamed jewelry supplier. By August 2015, the
chain stay has failed completely and his solution is then yet pending. Finally in February of this year, 2016, having taken a cue from Jameel Abraham, he has shifted to using an
external stay made of an aluminum strut secured with brass inserts. It's clear that this section of the book will be revised heavily in subsequent editions. This lid support method was hastily explained and not a sensible solution for a heavy lid.
I've come up with a few solutions of my own that fit in nicely with the overall spirit of anarchy.
The first suggestion I can make that deviates from Fr. Schwarz's method is the order of construction.
He states:
After the glue sets up, remove the clamps and drop the lid onto the top of the shell. If you have done everything flawlessly (highly unlikely) then the skirt and the seal should mate up perfectly all around the front and ends of the chest. At the rear of the chest, the inside face of the lid and the rim should just touch or be a hair's width apart.
If you don't achieve perfection (I didn't) then you need to plane the skirt around the lid and the dust seal around the shell until you achieve a perfect fit. Don't settle for anything less. This is a place where sloppy work will be obvious.
When everything fits and sits correctly, drive cut nails through the skirt and into the rails and stiles. These nails are there in case the glue ever fails. It might seem a bit much, but lots of old chests have nails as a fail-safe. (p426)
I had gotten as far as having the upper skirt pieces cut to length and the dovetails cut and tried while I awaited the proper hinges. While looking at those four boards holding on by friction, I changed the order of construction to allow for the high degree of likelihood that dimensioned boards are never as square or straight as they are in theory. Even though my corners were square, the corner-to corner measurements were off by about 4mm. This is because the boards are not consistently parallel, bowing, twisting, and flexing along their lengths. I came up with a solution to simplify installation and to take these common inconsistencies into account. The first suggestion is to fit the lid to the chest without the dust seal. Not only is it thus much lighter, but it's easier to fit and attach without the additional wood trim to get in the way or potentially suffer damage. I constructed my lid, overbuilt as Schwarz sagely recommends, with two boards running the full width attached with M&T joints at the corner and a raised floating panel. I glued and pegged these at the inside corners, which I thought would be stronger, but it also meant that the shorter boards shrunk across their widths, leaving a gap along one side. The front and back rails function, therefore, as breadboard ends of a sort. I've used this sort of construction before and have come to expect a certain amount of seasonal variation, enough to feel ridges at previously flush surfaces. Again, this is plantation grown SYP with unresolved issues, demanding patience and forgiveness.
 |
| Inevitability of gaps |
Schwarz talks about how 2 hinges are sufficient for supporting a lid but three are better. (p371) Pschaw, if three are better, four, therefore, clearly are the best! I've repaired enough cabinets in my time to know how many problems are caused by relying two hinges. If one of the two hinges is damaged from abuse (you all have my permission to smack anybody who sits or leans on an opened kitchen cabinet door. I'll pay the legal fees.), misalignment, or stripped screws, the second hinge suffers consequently as more stress is placed on it by the first failing hinge. Resetting hinges and repairing screw holes are tedious, frustrating tasks.
When opting for three hinges, setting the outer two is easy: a marking gauge set from the outside edges marks off the edges of the hinge placements, instantly centering them. Placing the third hinge in the middle, consequently, becomes a bit more challenging. It's necessary to find the center of the chest's back board and the center of the hinge before marking the recess to accept it. In less time than it takes to fiddle with finding the center, a pair of dividers can easily step off from the outlines of the outer set of hinges. Simply put, spacing out four hinges symmetrically is much faster than three. This situation also reminds me of an analogy from WW2. Four engines bombers were superior to 2 engine models because redundancy allowed for three engine failures, leaving one sole functioning engine sufficient to maintain aloft a flight crew back to a home airfield. Redundancy is crucial and supporting my contention, the belligerent side with more 4 engine bombers won the war. Make your toolchest a four hinge bomber for victory!
I transferred the marks for the hinges from base to the lid. I then chopped out the recesses so that the hinges would sit flush with the back edge. This is also much faster than cutting two shallower sets of recesses on both lid and base. I certainly see no advantage in recessing both sides here. I doublechecked by setting the lid on the hinges in their custom fit rabbets. I fully opened a hinge to set the hole spacing from the outside edge, placing it between the transferred marks. I installed two hinges to test fit and then screwed the latter two. It went so smoothly that I sensed a big error was yet to reveal itself.
 |
| Ready for a dogfight with the Luftwaffe |
Here is another step where I deviate from Schwarz's assembly process. Only now do I attach the dust seal to the lid. I did have to plane down the base a wee bit to allow for it, but this proved to be a simpler task before the seal was affixed. I left the side lengths long in anticipation of cutting them to act as stops against the upper skirt. I dovetailed the front corners, glued the three pieces in place and then drove in some cut finish nails.
The upper skirt had been cut and ready to apply long ago but I held off, thinking that any strap hinges might interfere with it and
need some modifications before attachment. (Rule of thumb: always buy
hardware before starting a project.) The hardware still determines most
everything else. With the lid assembly finished, I then slipped the upper skirt up to match the contours on the dust seal now firmly fastened to the lid. By following this order, there can be no gaps between these skirts along the perimeter but due to the problems with wood selection, there are some uneven sections on my chest. I could have avoided this by testing fitting and thickness planning each section before measuring to length and cutting the dovetails. I will this on any subsequent chests just as I advise any reader to do likewise.
But what about the backstop from those end pieces that are purposefully left long even though Schwarz expresses misgivings about this feature? I'll try to explain how to cut this end to give it an attractive finial detail, but mainly as a pretext for how to create a lid support that works even better.
The first point to make is how befuddling radial movements are for woodworkers to visual and difficult to get right. The trick is to extend the pivot point of the hinge to the outer boards and then to use that to inscribe a radius.
 |
| Exact in theory |
 |
| 10 degree |
 |
| easier than using a compass |
 |
| It only looks so right |
Laying out an arc of often easier with a circle template than using a compass.
I wanted the lid to sit back at a 10 degree angle so I set a line tangent to this circle.
And the result came up short because I failed to take into account for the offset from setting the hinges in only the bottom frame. I should have added this offset to the distance from the extended pivot, moving it backwards by half the thickness of the hinges before inscribing the circle.
The ultimate point of this exposition is to show that the best method for supporting a chest lid is not with the method described by Schwarz, but with stops mounted to the back. These have a 10 degree cut below the horizon. It's faster to show a picture than to write about.
 |
| Narex long chisels in their dedicated till |
 |
| Countersunk screws and waxed runners |
I've had my eye on a small chest that a coworker has had on his desk. Its main feature is an integral pivot hinge. I've made a wooden hinge before, following the guidelines and examples from
Pfollansbee. This one upped the complexity of that feature. I'm not even sure what to call this style of hinge. One visitor to the woodshop wanted to proudly pointed out that this little chest was made without nails. (I've been reminded on previous occasions that Chinese don't like nails.) Technically true, if nails as defined are always made from metal. The top is, in fact, 'nailed' down with bamboo pegs. I don't know how this is done and neither do my Chinese colleagues. I thought the owner's grandfather made this box, but he clarified when I asked him for details of its construction that his grandfather only owned the box.
 |
| The split top with bamboo alignment dowels |
 |
| The lid ajar demonstrating the integral hinge |
The bamboo nails might have allowed for some seasonal wood movement but they didn't prevent the top from eventually splitting. I wanted to recreate this project to better understand its workings and the process for laying out the pivot hinge. In the end, I opted for a different style of lid while keeping the overall dimensions.
I was not able, nor did I want, to disassemble the piece so I copied down dimensions where I could. The front and back sides are all 16 mm and the pivoting piece with the round tenons is about 20 mm. The original has halfblind dovetails, which I chose to eschew, opting for throughdovetails to simplify construction and to save time, and honestly, which exceed my skills and patience on such thin stock. I opted for bottom and top panels inset into grooves. The original seems to have a bottom inset into a rabbet and held in place with glue and bamboo nails. It might be evidence of a repair but I cannot determine.
The dimensions of the base are 42cm wide and 26.5cm deep and 16 cm high. This worked out well for me because I could not get pine stock wider than 20 cm. The back piece was cut to be 12.5cm high.
I proceeded to cut and fit these pieces without fully knowing how this chest would come together with the internal lid hinge. The bottom dovetails hide the grooves that receive the bottom panel. The back sides must have halftails on the top to allow for the pivoting tenons in the lid back. This, therefore, requires different spacing from the front. With all this in mind, I gangsawed the two sides and then rabbeted the tails before transferring the outline to the pin boards. I then marked the lowest dovetail with a deeper rabbet from the outside face and used this same setting to connect the lines between the lowest two pins. This is necessary to do before cutting the pins lest the kerf be too deep.
 |
| As per The Essential Woodworker, Robert Wearing |
I did all this and then panicked when I thought that this rabbeted edge, which is not on the original, might make it impossible to recreate a functioning hinge. By happenstance, I was able to create a much better design than I found in the original.
The next task was to fashion the back of the lid with the two round tenons. The overall length is still 42 cm, the same as the width. The two back pieces overlap with edges cut at 45 degrees. It's important to not create a weak edge so the 45 degree is set back form the top edge by a few mm. In my first attempt at this project, I made the mistake of applying the same method to cutting a corresponding 45 degree angle to the lid back. It's much better to transfer the thickness of the bottom back (16mm) to the bottom edge of the lid back by using a marking gauge and then on the exterior face. This exactly corresponds to the relief on the lower edge.
 |
| Determining the dimension for the round mortise |
By now it is clear that the orientation of the dovetails must correspond to the assembly method of the round tenons and mortises on the sides. This lower assembly is glued up before the lid can be assembled and glued around the moveable back piece.
I suspect that many others have the same difficulty as I do when trying to rotate objects mentally around an axis. This is one aspect that unites this project with the lid rest above. I don't even think that this is the main difficulty of making this pivot hinge. There are a few constraints that must be considered when building a box with this principle. The larger a round tenon is, the strong it will be, in this example, 10mm. Yet as a tenon gets larger, it increases the size of the mortise hole, leaving weaker, short grain at the edge, in this case, also about 10mm from outside edge to the round mortise edge. It's simple enough to imagine an misfitting pieces wrack the moveable joint apart and either split the mortise or sever off the tenon. This is the first example that I have come across of this type, but I suspect that there is an upper limit as to what size a chest lid that this feature can be applied to.
The first step is to lay out the placement of the round tenon. This is done by extending a 45 degree line from the outside edge where the 45 degree overlap has been planed away and then scribing a line 5mm (the radius of the 10mm tenon) from the inside face of the lid back.
 |
| waste removal on a jig; a shim is used to raise the sliding bed surface |
 |
| Knife lines and pencil mark |
I prefer to use a circle template to circumscribe a 10mm circle rather than to use a compass. The length of the tenon is the same marking gauge setting as when used to scribe the rabbeting for the dovetail joint on the tailboard. Only just remove enough wood to temporarily fit it to the round mortises. The remaining wood will be a pin that intersects with two half tails.
A best method for cutting a round tenon is as follows: 1) Drill a 10 mm hole near the edge of a scrap piece. 2) Pare down to a fat tenon. 3) Push this tenon into the dummy mortise, repeatedly compressing the fibers into round and scraping to fit. 4) Carefully cut and trim any remaining fibers at the base of the tenon to ensure a smooth, tight motion.
The layout of cutting lines cannot be completed until the mortise holes are bored into the sides. The mortise hole centers are found by transferring the bisect lines from the tenon onto the sides. The best method for this is to lay down the base back and the back lid boards up against one another close together but not too close and then to measure from the bottom. Since the placement of the round tenon is determined from the inside surface, a new dimension must be found and transferred to the sides with a marking gauge reset from the outside of the lid back.
 |
| Finding the center for the mortise hole |
The measurement from the top to the center of the mortise becomes a radius to describe an arc that the lid edge will make when open the lid.
 |
| The edge of the wood to remove |
A circle template can also be used to mark this radius. This waste can be pared down fat so that the excess can be finalized after the lid sides are fit in place. I rub the underside with a pencil lead to see where to pare to a final fit.
 |
| Sawn at the line, chopped out between the tenon and eventual dovetail pin
|
|
 |
| More burnished than cut to fit |
 |
| Cut and ready to be tried |
After the tenons are properly fit to the mortises, work can begin on the internal lid stop. This works by taking advantage of the same rabbet that was used for the dovetail joint. A line is scribed tangent to the mortise hole and10 degrees below horizontal. This allows the lid to open 80 degrees, adequate for full access and with the lid's mass over the vertical centerline.
 |
| Tangential more or less |
 |
| Quickly estimating the extent of the waste to be removed |
 |
| Finished internal backstop |
 |
| Fettling the lid back |
Depending on the position of the round tenon from the inside edge of the lid back, it might be necessary to widen the rabbet on this upper section.
I leave the front and sides of the lid a little wider than I anticipate they need to be. The bottom of the groove in the lid must meet with the top of the back and this measurement is most readily found after the lid back has been fit and the base glued together. It's easier to show with photos than to write about.
 |
| The lid side resting proud on the assembled base |
 |
| After being cut narrower so the bottom of the groove is coplanar with the top of the lid back |
I see many students who struggle with dovetails and end up with two halftails instead of halfpins. I drill them how to layout with full tails as standard practice. I explain to them that full tails look better with a caveat, in passing, that there are exceptions. This Chinese chest conveniently provides two such exceptions. The first, as I have mentioned above, is that that back sides must have a halftail on the top to allow for the pivoting back.
The lid back is most easily made with two halftails and a single pin. While I don't want to get into another pins or tails first debate, I suggest that the easier method of assembly is still tails first here.
I find it easier to cut the halftails in the lid sides before transferring the markings to the lid back in place while resting the lid sides on the base. The front corners of the lid can be constructed with one of two full tails. This assembly requires the base to be glued only after all these joints have been cut and dryfit.
In order to round over the top back of the sides, it is necessary to extend an arc from the tangent of the lid to the back. I wish I could say that it were so easy but it will still be necessary to plane off the excess wood incrementally during dryfit assembly. But that's why we buy handtools, right?
 |
| Defining the relief curve from the tangential intersection |
Instead of simply nailing down the top with bamboo nails as in the original, I decided to attach it in grooves as though it were an upside down drawer. I edgeglued two pieces of pine and then veneered the interior faces with a hardwood, beech, in this example. I have ample supplies of this incidental veneer in this woodshop. I also decided to scratch a bead to the front edge. I've learned a bit about using my beading plane to better effect in making these boxes. It's difficult to get a beaded edge consistent along its length. It can be next to impossible to get the ends as regular as the middle of the run. For this reason it's helpful to work a piece long and cut the beaded section to length after completion.
 |
| An beaded end with a bulge |
 |
| Trimmed off with the rabbeted edge |
After dryftitting the whole assembly and then testing the movement of the lid, I glue the base sides with hide glue, allowing the bottom panel to float freely in its grooves and insert the tenons of the lid back into the mortise holes.
 |
| Base pieces laid out for gluing up |
 |
| Cross sectional |
After the hide glue is sufficiently set, the lid pieces can be glued up also. I slide the top into the grooves, attaching it with glue only at the front, allowing for expansion across the width front to back. All of this advice has come at a high cost of my capacity for calmness
and serene, mental focus. I hope others may benefit from these
expenditures.
In my first attempt at this chest, I sawed off all the excess wood around the round tenon, leaving me nothing to cut a pin from. I salvaged this screwup by gluing a butt joint here and then I drilled and strengthened the junction with exotic hardwood pins. I, of course, used pins with strongly contrasting colors to persuade observers into believing that it was all part of a well conceived plan. It's an optional method of construction.
 |
| Repaired in plain sight |
I have given one of these chests to the same colleague whose grandfather once preserved it for so many years. I'll leave him to decide how to finish it. My preference is for a milk paint and wax finish. The original was painted coarsely with a dark stain. I've fit sliding tills in both prototypes, using camphor wood to act as rust preventative.
Coming full circle back to Schwarz who mentions this amazing tree species in his book, Campaign Furniture. He mentions the difficulty in obtaining samples to work with:
As I searched for a good supply of camphor, I was told and time again that it was rare, expensive and impossible to get. But while visiting Australia in 2013 I was surprised to find that camphor laurel (Cinnamomum camphora) was growing everywhere around Melbourne. In fact. the tree had been introduced from Asia and categorized as a "noxious weed." Residents were eager to cut down the enormous trees, and many woodworkers I met there were unaware of its place in campaign history.
The Chinese name for the camphor tree is
樟树 (zhang shu)
 |
| From just outside the woodshop, referred here as Xiang Zhang or Fragrant Camphor |
 |
| The spreading camphor canopy |
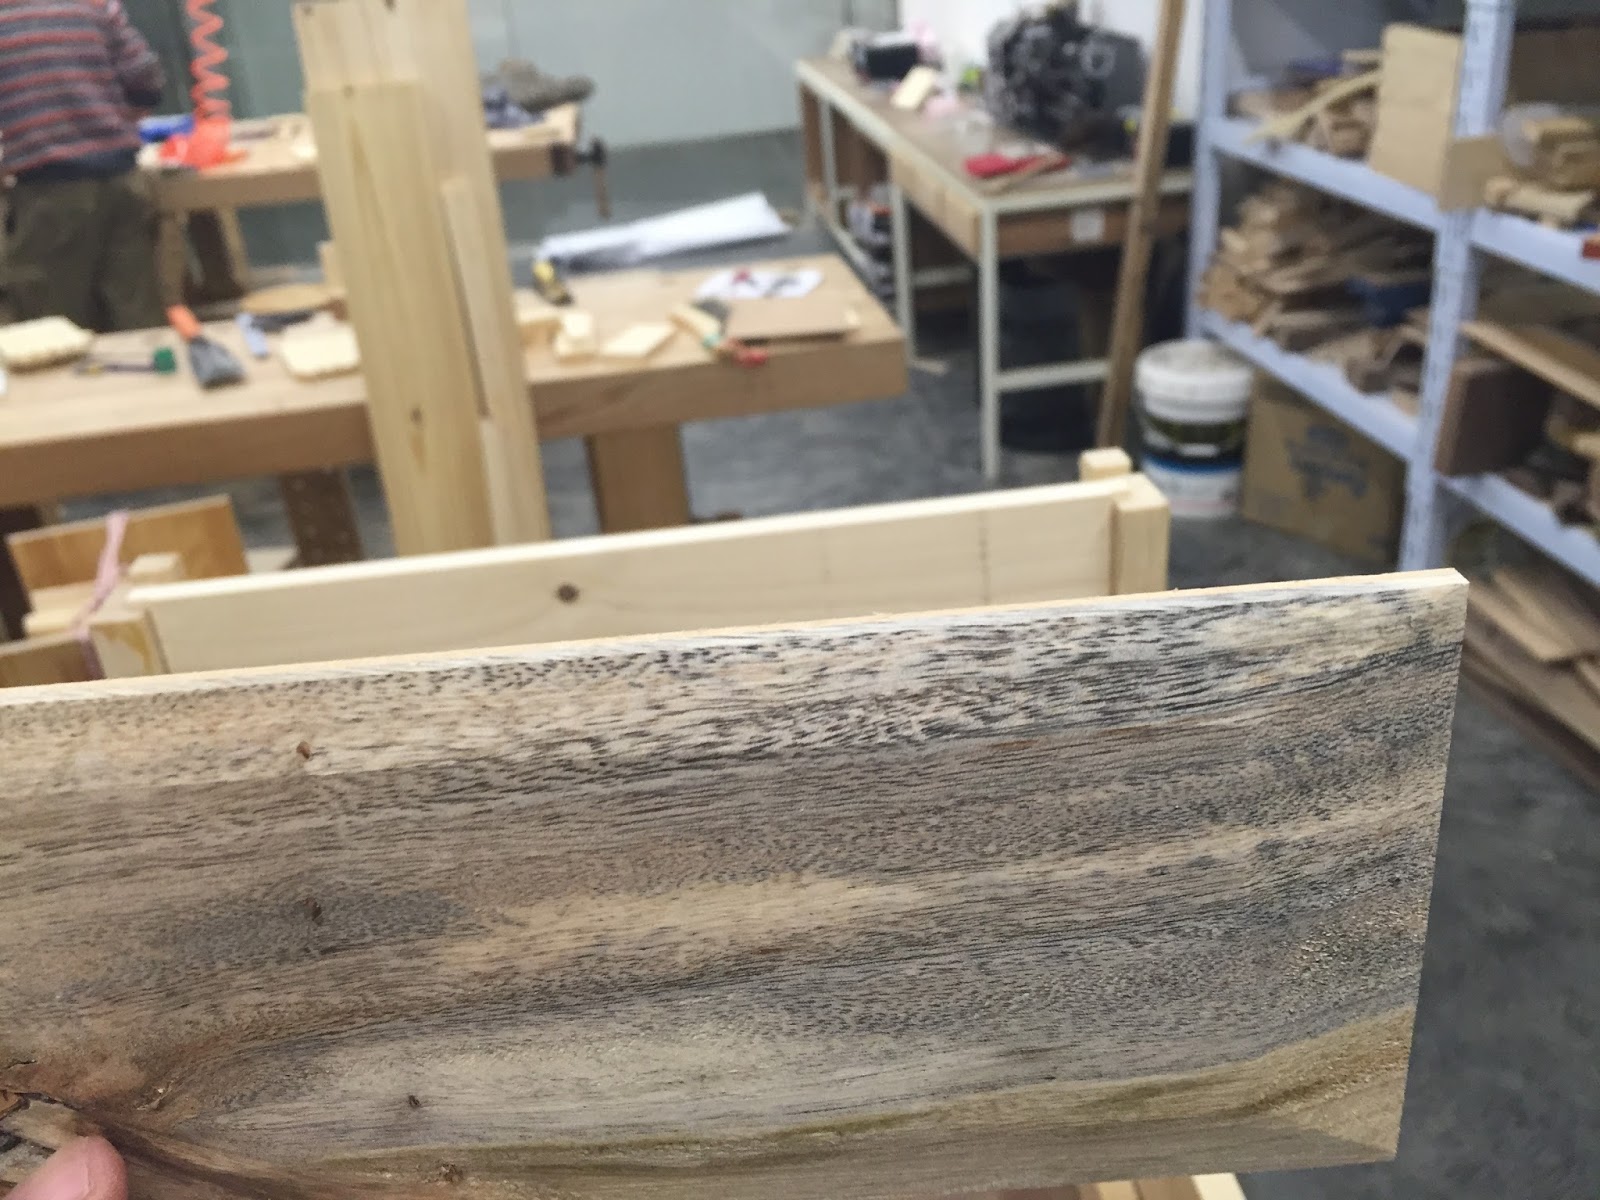
I cannot say anything definitive about the nature of Cinnamomum spp. in case construction since I have never seen it used as a primary wood.
 |
| The wood grain |
 |
| Bottom panel |
Its chemical and aromatic properties are well established and deserve to be better known again by woodworkers. As in Melbourne, this tree is frequently planted in Chinese cities. The stock I have been using came from a downed urban tree that was milled and airdried on the premises. It produces a very noticeable aroma whenever it is cut into. Tommy Mac complained to me that it stank when he sanded it as a burl veneer for a tabletop. He turned down the samples that I offered. The supply on hand is open grained and fairly light weight. It is also very pliable when sliced into thin strips. I can understand its chemical advantages in campaign furniture, but I doubt that it would make for good structural components. This might not be true of trees with tighter growth rings that grew up under a dense forest canopy. I try to incorporate it in all toolchests that I build. It can be used in the same way that aromatic western red cedar is used for protecting clothes. Camphor aroma acts as a rust preventative. I am certain that camphor laurel can be grown in much of the USA that experiences mild winters. A quick review of its
wikipedia page explains that it was introduced into the USA in 1875 and has been naturalized in most southern states. It makes me wonder whether Schwarz wholesale lumber suppliers knew what they were talking about. It's frequently the case that a
species labelled an i
nvasive exotic gets ignored as being unusable or unmarketable simply because it is so common. The camphor laurel produces a dark blue berry that stains the sidewalks nearby. Bird droppings might explain how this tree can become weedy and widespread.
I strongly believe that Camphor can be found in the USA, perhaps even in Kentucky since the climate allows for it. It is likely that because it has never been used as a commercial wood, it is little understood and not readily identified in the field by eye. For those who cannot find any local sources of the woodstock, I can suggest that the
wax can be purchased and blended with paraffin as a lubricant for runners.
 |
| Applied till runner |
 |
| Propped ajar |
 |
| Closed and assembled |
 |
| sliding till installed |